Table of Contents
A TV can transform your RV from a simple travel vehicle into a cozy, entertainment-ready home on wheels. Whether you’re relaxing on a rainy day, keeping the kids entertained, or watching your favorite shows after a long drive, a securely mounted TV offers comfort and convenience on the road.
Unlike in a house, installing a TV in an RV comes with unique challenges. Limited wall space, thinner wall construction, constant vibrations, and the need for secure locking mechanisms mean you can’t simply use a standard home TV mount. This guide will walk you through the entire process—choosing the right mount, locating your RV’s backer plate, installing it safely, and keeping it secure for travel—so you can enjoy worry-free entertainment wherever you go.
Introduction
A mounted TV can make your RV feel more like home, offering entertainment, saving space, and improving safety while on the road.
Benefits of a Mounted TV in an RV
- Entertainment Anywhere: Enjoy movies, shows, or sports wherever you travel, perfect for rainy days or quiet evenings.
- Versatile Use: Use your TV as a monitor for work, presentations, or educational content for kids.
- Better Group Viewing: A larger, wall mounted screen makes watching together more enjoyable.
Safety & Space Saving
- Safety First: RV specific mounts are designed to handle vibrations, bumps, and movement, keeping your TV secure during travel.
- More Space: Wall mounting frees up counters and floors in compact RVs. Folding or locking mounts can store the TV flat against the wall when not in use.
- Proper Mounting Surfaces: RV walls differ from home walls that always mount to reinforced backers or studs for stability.
What This Guide Covers
You’ll learn:
- Types of RV friendly TV mounts
- How to pick the safest, most practical location
- The right hardware for your setup
- Step by step installation for a secure, long lasting mount
Follow these steps to enjoy a comfortable, safe, and space efficient TV setup on all your travels.
Understanding RV TV Mounts and Backers
Definition
A TV backer (or backer plate) is a reinforced panel usually plywood hidden inside an RV wall. It provides a strong, stable spot to mount TVs or other heavy items by spreading the weight over a larger area.
How to Find It
- Look for a manufacturer’s sticker marking the backer location.
- Knock on the wall solid sound means backer, hollow sound means empty space.
- Use a stud finder (though it may be less accurate on thin RV walls).
- Check inside cabinets, closets, or behind panels for confirmation.
Why Is It Important?
Mounting directly to thin RV wall panels can cause cracks or failures, especially on bumpy roads. A backer ensures a secure hold, supports the weight during travel, and reduces the risk of the TV coming loose.
Types of RV TV Mounts
| Type | Best For | Key Features |
| Fixed Mount | Permanent viewing from one position | The TV sits flat and close to the wall, very sturdy, minimal moving parts. |
| Tilting Mount | Mounting higher or lower than eye level | Angles up/down, compact, secure for travel. |
| Full Motion / Articulating | Multiple viewing angles | Extends, swivels, tilts; must lock before driving. |
| Locking RV Specific | Travel stability with flexibility | Built for road vibrations, includes a lock for secure transport. |
Choosing the Right One
- For most RVs, a locking, RV specific mount is the safest choice.
- Pick a fixed mount for maximum sturdiness and simplicity.
- Choose tilting or full motion if you want adjustable viewing but ensure it locks securely for travel.
Tools and Materials Needed
Having everything ready before you start will make mounting your TV faster, safer, and more accurate.
Essential Tools
- Drill: For pilot holes and driving screws or bolts. Use the bit size recommended by the mount’s instructions.
- Screwdriver: Manual for control, powered for speed.
- Stud Finder or Backer Locator: Finds the backer plate or wall studs.
- Level: Ensures the mount is perfectly straight.
- Measuring Tape: For accurate placement and alignment.
- Pencil or Marker: For marking pilot hole positions.
Mounting Hardware and Accessories
- Screws or Bolts: Heavy duty, rated for your TV’s weight and wall type.
- Washers: Spread the load and improve security.
- Cable Ties or Cord Management: Keep cables organized and secure during travel.
Optional Extras
- Socket wrench set for certain bolts
- Painter’s tape for temporary marks
- Small vacuum or dustpan for drill debris
- Safety glasses for eye protection
Tip: Keep all tools together in a small bin or toolbox so you don’t have to search for them mid install.
Step by Step Installation Guide

Choose a Compatible TV and Mount
Select a TV that does not exceed the weight capacity of your RV’s backer plate and wall. Check that the VESA pattern on the TV matches the mount (e.g., 75×75 mm, 100×100 mm) and that the mount is rated for both size and weight.
Mark Mount Locations
Find the backer using a label, stud finder, or tap test. Hold the mount in place, use a level for alignment, and mark screw holes lightly with a pencil. Confirm there are no hidden wires or plumbing before drilling.
Attach the Mount to the Backer
Drill pilot holes to prevent splitting, then secure the mount with the provided screws or bolts. Ensure fasteners are long enough for a strong hold but not so long they pierce the exterior wall. Tighten firmly without over torquing.
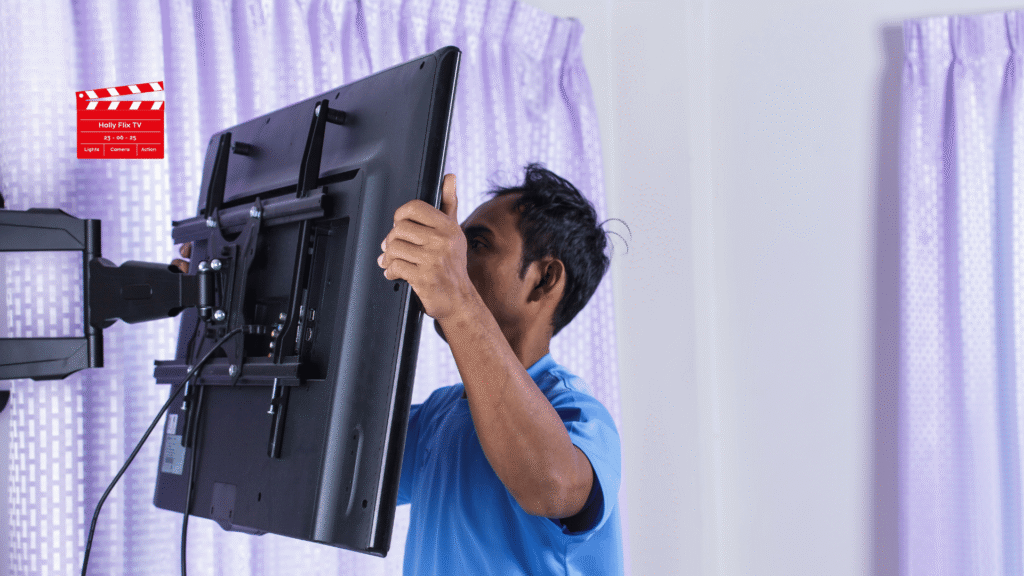
Attach the TV to the Mount
Fix the brackets to the back of the TV using the correct screws. With assistance if needed, lift the TV, align it with the wall mount, and lock it into place. Check stability by gently testing for movement.
Connect Power and Cables
Plug into the nearest TV designated outlet. Connect any HDMI, coaxial, or satellite cables. Use cable ties or clips to keep cords neat and secure for travel.
Following these steps will give you a safe, sturdy, and road ready RV TV installation.
Special Considerations for RVs Without a Prepped Backer
Installing Without a Backer
Mounting a TV directly to RV paneling is risky; it can damage the wall, loosen during travel, and create safety hazards.
Safer Alternatives:
- Add a Wood Backer: Install plywood or a pine board behind the wall or inside cabinetry at the desired location.
- Use Sturdy Cabinetry: Mount to the side or bottom of a strong cabinet where solid wood is available.
- Wall Anchors: Heavy duty RV specific anchors can be used for small, lightweight TVs only.
- Alternative Locations: Secure the mount to furniture, an overhead shelf, or any solid wood surface.
Wall Preparation Tips
- Find Studs or Add Reinforcement: Use a stud finder or inspect cabinetry and seams. If needed, install a ¾ inch plywood backer between studs.
- Choose Lightweight TVs: Slim LED models reduce strain on improvised mounts.
- Use Proper Fasteners: Select anchors rated for RV wall materials and avoid overtightening.
- Remove TV for Travel: If the mount is not fully secure, take the TV down before moving.
Summary:
The safest approach without a factory backer is to add your own plywood support or mount to solid cabinetry. Anchors into paneling should only be used for small, lightweight TVs and are less secure for long term travel.
Safety and Travel Tips
Secure the TV for Travel
Use an RV specific mount with a locking mechanism to handle vibrations and bumps. For extra protection, add safety straps or bungee cords, and consider padded covers to absorb shocks.
Check Hardware Regularly
Inspect screws, bolts, and locks before and after trips. Tighten any loose parts to prevent the TV from shifting or falling.
Stay Within Weight Limits
Never exceed the weight capacity of the backer plate or mount. Choose lightweight TVs to reduce stress on walls and prevent cracks or detachment.
Manage Cables
Use ties or clips to secure cords, prevent strain on connectors, and keep the area tidy and safe.
Following these tips helps keep your TV secure, your mount stable, and your setup safe during every trip.
Troubleshooting Common Issues
1. Mount Feels Loose
- Tighten all screws and bolts, but avoid over tightening.
- Check for damage or weak anchors; use only heavy duty fasteners suited for RV walls.
- Confirm the mount is rated for your TV’s size and weight.
- Use a locking RV specific mount to prevent movement during travel.
2. Wall Damage During Installation
- Drill pilot holes to prevent cracks in paneling or backer wood.
- Use screw lengths appropriate for wall thickness.
- Replace screws that are too long and seal extra holes.
- Avoid mounting on thin paneling without a backer, add plywood reinforcement or mount to cabinetry.
3. Cable Interference or Poor Signal
- Check all coaxial and antenna connections for tightness.
- Swap in a known working cable to test.
- Inspect and secure connections at external antenna points.
- Use cable management tools to prevent strain and keep connections organized.
By checking fasteners, wall condition, mount compatibility, and cable connections, most RV TV mount issues can be fixed quickly and safely.
Conclusion
Installing a TV mount in your RV is a straightforward project when done with the right tools, proper planning, and attention to safety. By selecting a mount suited to RV use, securing it to a reinforced backer or solid surface, and keeping cables neatly managed, you’ll ensure a professional, travel-ready setup.
A securely mounted TV not only enhances comfort and entertainment but also maximizes your space and keeps your RV interior safer. With these steps in place, you can enjoy movies, shows, and sports anywhere your travels take you—without worrying about your TV shifting or falling during the journey.
Key Steps Recap
- Select a TV and mount suited to your RV’s backer and weight limits.
- Locate the backer or structural stud with a stud finder or tap test.
- Mark and level the mount position, then drill pilot holes.
- Secure the mount with appropriate screws.
- Attach brackets to the TV, lift it into place, and lock it securely.
- Connect power and cables, then organize cords with ties or clips.
- Lock the TV for travel and check hardware regularly.
Final Note
A well mounted TV adds comfort, saves space, and enhances your RV experience. With proper installation and maintenance, you’ll enjoy safe and reliable entertainment on the road.
Frequently Asked Questions:
You can, but it’s not recommended. RV-specific mounts are designed to handle vibrations, bumps, and road movement, often with locking features to keep the TV secure.
Look for a manufacturer’s sticker, use a stud finder, or tap along the wall to find a solid area. Some RV manuals also include diagrams showing backer locations.
You can add your own plywood backer, mount to sturdy cabinetry, or use heavy-duty RV wall anchors for lightweight TVs.
Not if you drill pilot holes, use the correct fasteners, and secure the mount to a backer or solid wood. Avoid mounting directly into thin paneling without reinforcement.
Inspect screws, bolts, and locking mechanisms before and after long trips. Tightening loose hardware regularly will help maintain stability.
Yes, as long as the mount is locked securely and the TV is properly supported. Many RV owners also use straps or covers for extra protection during travel.

They are a passionate group of entertainment writers, pop culture enthusiasts, and streaming industry analysts dedicated to bringing readers the latest updates from the world of movies, TV shows, anime, web series, and digital entertainment. From honest reviews and streaming guides to celebrity news, fan theories, and trending entertainment insights, the team delivers engaging, timely, and reader-focused content designed for modern binge-watchers and entertainment fans worldwide. Team HollyFlixTV helps audiences discover what’s worth watching across platforms like Netflix, Disney+, Prime Video, Hulu, and beyond.